oct

16

Posted by : admin | On : 16 octobre 2019

installation sous windows 10

* Pouvoir executer le power shell en administrateur

1 – Install Hyper-V in Windows 10. See Windows instructions.

2– Add the user to the local Hyper-V Administrators group.

PS command :


([adsi]"WinNT://./Hyper-V Administrators,group").Add("WinNT://$env:UserDomain/$env:Username,user")

ou bien manuellement sur pannaeau configuration -> outils administration


– Add an External Virtual Switch.  => (à Gauche  =>  Gestionnaire commutateur virtuel)
=> bien verifier le nom de la carte réseau ASSOCIE
Identify first the net adapter to use.
PS command :
Get-NetAdapter


Then store which one you want to use for Minishift network access.
PS command :
$net = Get-NetAdapter -Name 'Wi-Fi' A

At last create a virtual switch for Hyper-V :
New-VMSwitch -Name "External VM Switch" -AllowManagementOS $True -NetAdapterName $net.Name

I named it « External VM Switch » but the name doesn’t matter.
From now Powershell is not required any longer. You can use either PowerShell or cmd.exe.


2) Starting Up Minishift

  • Astuse Pour demarrer appliquer la commande  suivante sur windows

minishift config set skip-check-hyperv-driver true

Minishift has to aware of the external virtual switch to use.
You can set its name from the Minishift command arg or as a environment variable.

In theory, that should be enough but it will not the case on Windows 10:
minishift.exe config set hyperv-virtual-switch « External VM Switch »

minishift start


* Output power shell

– Starting profile ‘minishift’
– Check if deprecated options are used … OK
– Checking if https://github.com is reachable … OK
– Checking if requested OpenShift version ‘v3.11.0′ is valid … OK
– Checking if requested OpenShift version ‘v3.11.0′ is supported … OK
– Checking if requested hypervisor ‘hyperv’ is supported on this platform … OK
– Checking if Powershell is available … OK
– Checking if Hyper-V driver is installed … SKIP
– Checking if Hyper-V driver is configured to use a Virtual Switch … SKIP
– Checking if user is a member of the Hyper-V Administrators group … SKIP
– Checking the ISO URL … OK
– Downloading OpenShift binary ‘oc’ version ‘v3.11.0′
53.59 MiB / 53.59 MiB [===================================================================================] 100.00% 0s– Downloading OpenShift v3.11.0 checksums … OK
– Checking if provided oc flags are supported … OK
– Starting the OpenShift cluster using ‘hyperv’ hypervisor …
– Minishift VM will be configured with …
Memory:    4 GB
vCPUs :    2
Disk size: 20 GB

Downloading ISO ‘https://github.com/minishift/minishift-centos-iso/releases/download/v1.15.0/minishift-centos7.iso’
355.00 MiB / 355.00 MiB [


This command execution will download the Minishift ISO but will fail when it try to retrieve the downloaded ISO on Windows 10 because of the path specified in the running script that relies on the Linux based filesystem layout.
After the failure, a simple workaround is to move the downloaded ISO where you like and to refer it as you execute the start command of the Minishift executable.
It would give :
minishift start --hyperv-virtual-switch "External VM Switch" --iso-url file://D:/minishift/minishift-centos7.iso
Where you should refer in iso-url the file URI of the Minishift ISO.
The startup will take a some time. At the end you should see something like :


3) Stop Minishift

As you finished to use Minishift in most of case you don’t want to delete all files created to start it.
So you want to release memory/cpu resources allocated to Minishift by stopping it :
minishift stop

4) Delete Minishift

A weird issue with Minishift or the need to start from scratch : delete files associated to the Minishift instance/cluster : minishift delete --force

4) Problems to start up Minishift ?


Q : I have a broad error but I don’t see the cause.
A : Increase the logging verbosity by adding  arguments in the minishift command :  --show-libmachine-logs -v5

Q : I feel that I fixed what it was wrong or missing but the minishift startup still fails.
A : delete startup files and restart Minishift from scratch.
This command will help :
minishift delete --force

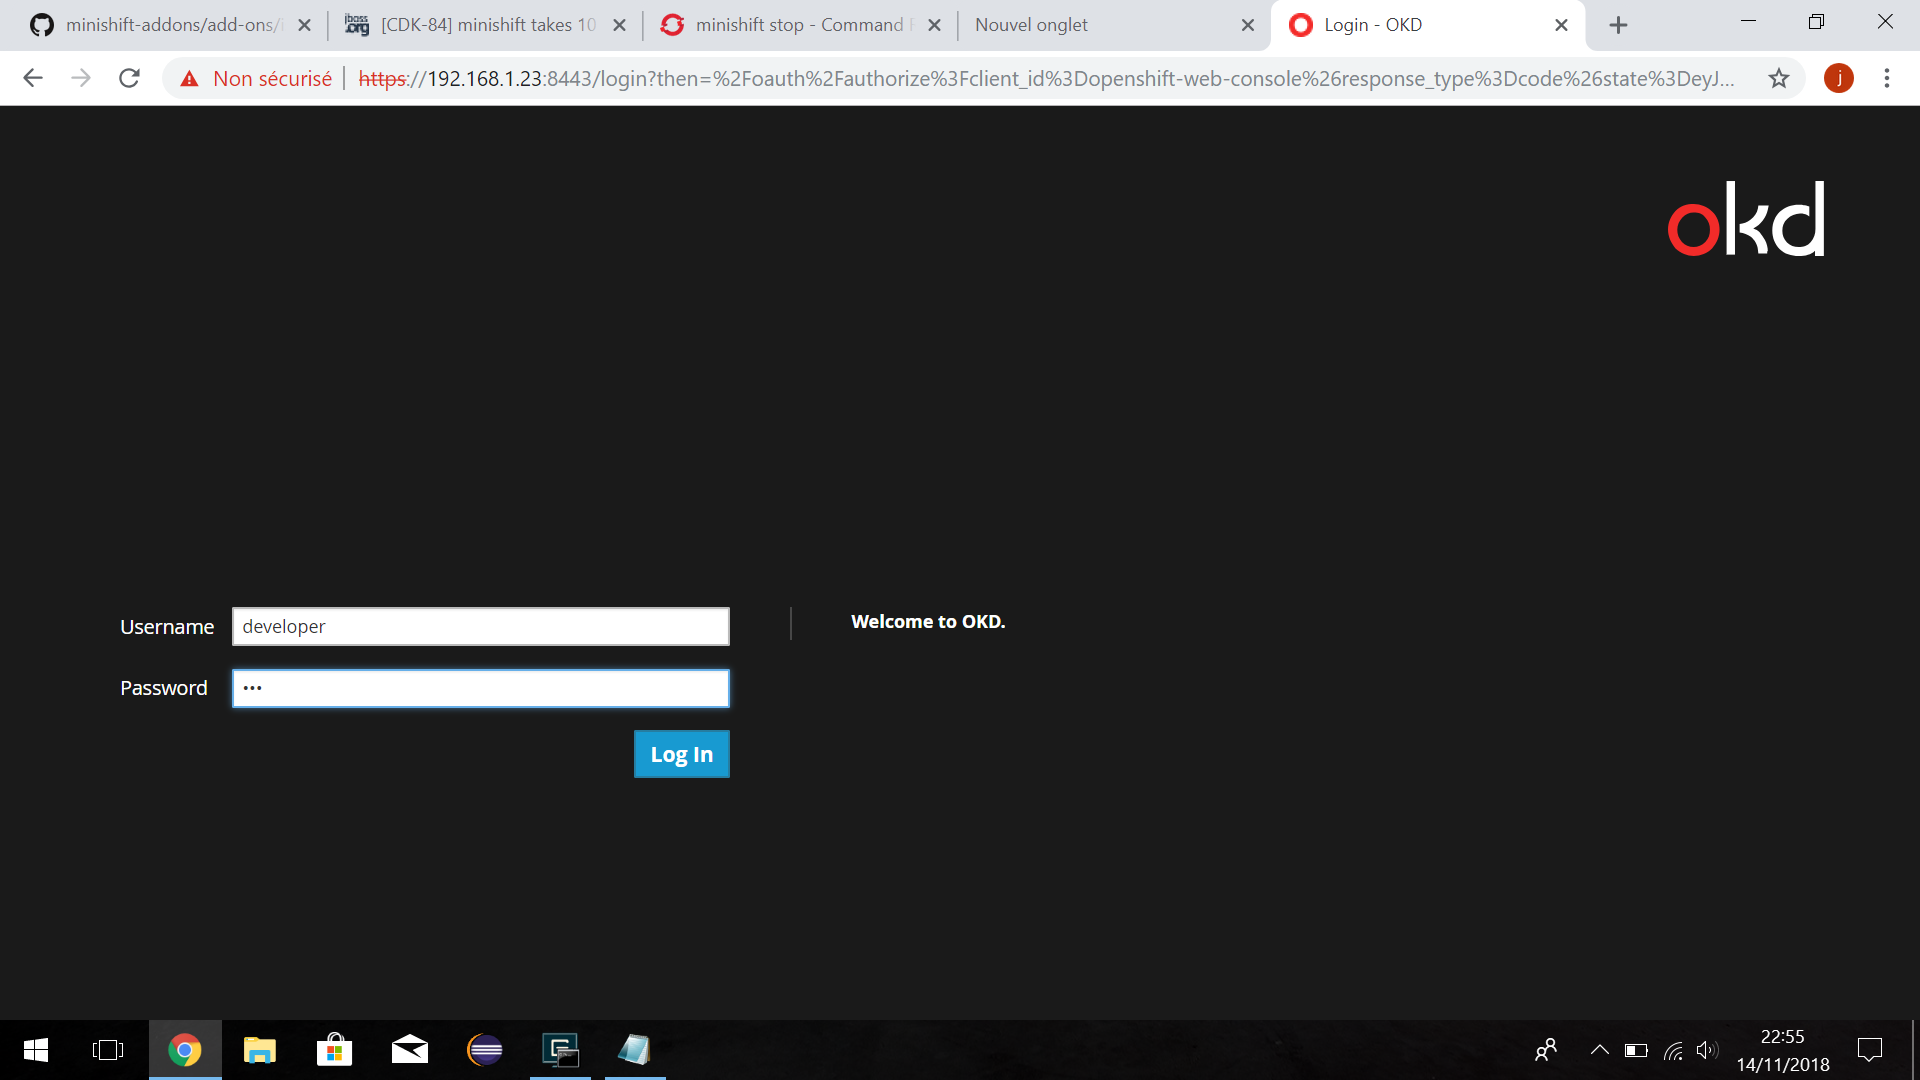
5) Opening Minishift console

Either use the URL provided in the logs or use the console option that is minishift console :

minishift-logging

Install ISTIO, next step !


autre source ; RHEL official doc

https://www.marksei.com/openshift-minishift-widnows/

http://myjavaadventures.com/blog/2018/11/15/installer-minishift/

https://blog.dbi-services.com/openshift-on-my-windows-10-laptop-with-minishift/

https://www.informatiweb.net/tutoriels/informatique/11-virtualisation/268–virtualbox-comment-utiliser-et-configurer-les-differents-modes-d-acces-reseau-d-une-machine-virtuelle–2.html#host-only-adapter

https://access.redhat.com/documentation/en-us/red_hat_container_development_kit/3.3/html/getting_started_guide/getting_started_with_container_development_kit

jan

03

Posted by : admin | On : 3 janvier 2017

How to o linux Mint

node v0.10
npm v2.1.0+
git

curl -sL https://deb.nodesource.com/setup_6.x | sudo -E bash -
apt-get update
sudo apt-get install -y nodejs

curl -sL https://deb.nodesource.com/setup_7.x | sudo -E bash -
sudo apt-get install -y nodejs

sudo apt-get update && apt-get install git-core curl build-essential openssl libssl-dev

#Quick cp from http://sekati.com/etc/install-nodejs-on-debian-squeeze
#
#Needed to install TileMill from MapBox
#
#Installs node.js which has npm bundled
#

#Build Dependencies

sudo apt-get update && apt-get install git-core curl build-essential openssl libssl-dev

#Install Node.js & NPM

git clone https://github.com/joyent/node.git
cd node

# ‘git tag’ shows all available versions: select the latest stable.
#git checkout v0.7.8
git checkout v0.12.7
# Configure seems not to find libssl by default so we give it an explicit pointer.
# Optionally: you can isolate node by adding –prefix=/opt/node

./configure –openssl-libpath=/usr/lib/ssl
make
make test
sudo make install
node -v # it’s alive!

# Luck us: NPM is packaged with Node.js source so this is now installed too
# curl http://npmjs.org/install.sh | sudo sh
npm -v # it’s alive!

http://myartaud.free.Fr/todomvc.zip


http://www.benchresources.net/apache-cxf-jax-rs-restful-web-service-integrating-with-spring-hibernate/

http://myartaud.free.Fr/dwl/cxf.7z

nov

11

Posted by : admin | On : 11 novembre 2014


tested in version opensuse 13.2

download the rpm on google music

then execute the command line

sudo zypper in google-musicmanager-beta_current_x86_64.rpm source https://www.alionet.org/content.php?415-Skype-dropbox-google-earth-google-musicmanager-sur-openSUSE-12-3-RC1

Extract mp3 from flv

Tonight I tried to rip the audio track from a flv file. First I wanted to convert it into ogg but as the audio track is a mp3 stream itself I decided just to rip the mp3 data into a file (same quality as in the video file. A higher samplerate would only increase filesize).

UPDATE: Today the audiostream is often aac (not mp3 anymore). That means, you have to use mp4 instead of mp3 with ffmpeg … -f mp4 … .mp4).

One of those commands will do the job:
mplayer -dumpaudio in-video.flv -dumpfile out-audio.mp3
ffmpeg -i input.flv -f mp3 -vn -acodec copy output.mp3

To convert all files (*.flv to *.mp3) in the directory use one of the following commands:
for i in *.flv; do mplayer -dumpaudio -dumpfile « ${i/.flv} ».mp3 « $i »; done
for i in *.flv; do ffmpeg -i « $i » -f mp3 -vn -acodec copy « ${i/.flv} ».mp3; done

#ffmpeg: -f mp3 => force mp3 format, -vn => novideo, -acodec copy => stream-copy
# ${i/.flv} is cutting the filename $i from « .flv »

UPDATE: As the files are not always in the same format and my portable music player couldn’t play mp4 I decided to convert them to ogg.
ffmpeg -i input.flv/mp4 -vn -acodec vorbis output.ogg

This script will transform all flv files in your directory into mp3 files.

1. Create a new file e.g. with kate and name it flv2mp3.sh

#!/bin/bash
for i in *.flv
do
echo « $i »
# Alternative 1
# mplayer -dumpaudio -dumpfile « ${i/.flv} ».mp3 « $i »
#Alternative 2
ffmpeg -i « $i » -f mp3 -vn -acodec copy « ${i/.flv} ».mp3
done

2. Change the right of this file:
chmod +x flv2mp3.sh

3. Goto the directory and run the script

oct

31

Posted by : admin | On : 31 octobre 2011

http://www.cae.wisc.edu/linux-sftp

sftp <user>@<host>

telecharger les fichiers

cd /home/localhost/files
 lcd /home/remote/files

Telecharger ses fichiers

sftp> mgets ./*
 sftp> mget ./*.csv

Upload ses fichiers

sftp > put ./*


Annexe

oct

24

Posted by : admin | On : 24 octobre 2011

Samba permet de partager des dossiers sous Linux avec des ordinateurs locaux sous Windows, très pratique, donc !
De plus, il permet d’établir un réseau relativement sécurisé grâce à ses nombreuses fonctions.

Commencez d’abord par l’installer : loguez vous en root puis tapez :

apt-get install samba

Il faut ensuite configurer quelques lignes du fichier smb.conf :

vi /etc/samba/smb.conf

Ligne 27, renseignez le nom de votre groupe de travail, par exemple WORKGROUP :


# Change this to the workgroup/NT-domain name your Samba server will part of
 workgroup = WORKGROUP
 Après « ####### Authentication ####### », ligne 70, tapez :
 hosts deny = ALL
 hosts allow = ***.***.*.*


en remplaçant ***.***.*.* par l’ip local de l’ordinateur qui aura accès aux partages.

Si vous souhaitez mettre plusieurs ip, séparez les par des espaces.

Un peu plus loin, ligne 79, décommentez la ligne

;security = user

en supprimant le point virgule.
Cela signifie que par défaut seuls les utilisateurs enregistrés auprès de samba auront accès aux partages. A l’inverse, « share » autorise n’importe quel accès anonyme et est donc un mode bien moins sécurisé.


Les droits d’accès sont à configurer dans la partie « Share Definitions » : Par défaut, ils sont très limités.
Tout d’abord, pour autoriser les utilisateurs à naviguer et à écrire dans leur dossier personnel , modifier la partie [homes] de cette mannière :


[homes]
 comment = Home Directories
 browseable = yes
 # By default, the home directories are exported read-only. Change next
 # parameter to 'yes' if you want to be able to write to them.
 writable = yes
 # File creation mask is set to 0700 for security reasons. If you want to
 # create files with group=rw permissions, set next parameter to 0775.
 create mask = 0644
 # Directory creation mask is set to 0700 for security reasons. If you want to
 # create dirs. with group=rw permissions, set next parameter to 0775.
 directory mask = 0755


« create mask » est le CHMOD associé aux fichiers créés, « directory mask » celui associé aux dossiers créés.


Vous pouvez également partager n’importe quel dossier, et cela de différentes façons.

Il faut commencer par le nom du partage entre crochets, puis renseigner les différentes règles qui lui seront affectées :

[Nom_du_partage]
 path = /chemin/du/dossier/partagé
 valid users = guillaume ou public = yes
 browseable = yes/no
 writeable = yes/no
 create mask = 0644
 directory mask = 0755

Si vous utilisez la règle « public », n’oubliez pas de décommentez a ligne « guest account » dans la partie « Authentification », et au besoin modifier le compte qui sera utilisé par défaut par les invités.


On en a finit avec le fichier smb.conf. Il faut maintenant ajouter les utilisateurs de Samba.

Il faut commencer par ajouter les utilisateurs au système si ils n’existent pas encore, utilisez pour cela la commande adduser que vous pouvez compléter par la spécification du dossier personnel, auquel l’utilisateur aurra acès par défaut via samba :

adduser --home /home/votre_dossier nouvel_utilisateur

Vous est alors demandé le mot de passe associé ainsi que différentes informations que vous pouvez laisser vide.

Pour que les utilisateurs système aie un accès Samba, utilisez la commande :

smbpasswd –a nom_du_compte

En utilisant le nom de compte et le mot de apsse associé d’un utilisateur système.

Comme d’habitude, finalisez en redémarrant ce service :

/etc/init.d/samba restart

Pour avoir accès aux partages depuis Windows XP, créez un compte au même nom et avec le même mot de passe que celui enregistré à l’aide de la commande smbpasswd.

  • Source :

http://www.henol.fr/article-samba.html,

http://www.nuxo.net/tutorial-15.html

oct

24

Posted by : admin | On : 24 octobre 2011


Vous pouvez monter votre serveur maison un bon 1U ultra sparc fera l’affaire .

Ou bien si vous ne souhaiter ne pas voir la machine chez vous vous pouvez opter dans ce cas là pour la location d’un serveur dédié dans un datacenter ou bien des petits partitions de serveur partagés . Ou si le « hype » vous dit une location en Cloud dans les nuages .

Dans cet article je vais essayer de présenter de manière synthétique une installation  comme on entend souvent « from scratch »

Pour cela je suis aller louer un serveur dédié Kimsufi chez OVH et rélaiser une install sous debian avec accés SSH sur port 22 par défault .

à partir de ce moment là je vous dit bienvenue dans lunivers des linuxien le noir et blanc est de vigueur :)

Ce que nous allons voir ici :

  1. Bash / vim
  2. installation webmin
  3. Apache 2 version prefork
  4. PHP5
  5. Serveur Bind9
  6. Serveur ProFtpd (serveur ftp)


  • A quoi tout ca va nous servir ?
  1. Webmin à administrer notre serveur pour les taches récurrentes  (créer une zone primaire , configurer l’adresse d’un nouveau site..) plus quà faire du click click
  2. apache2 notre serveur applicatif qui va interpréter notre langage PHP5
  3. Bind 9 = ca va être notre glue noms de domaines / noms du serveur
  4. Proftp = serveur FTP pour transferer nos fichiers via le port 21 (FTP)


Configuration du Bash

dans le fichier /root/.bashrc


~/.bashrc
export LS_OPTIONS='--color=auto'
eval "`dircolors`"
alias ls='ls $LS_OPTIONS'
alias ll='ls $LS_OPTIONS -l'
alias l='ls $LS_OPTIONS -lA'


configuration de Vim

/etc/vim/vimrc

syntax on
set paste
set background=dark
set softtabstop=4
set shiftwidth=4
set tabstop=4
set expandtab
Redemarrage du service SSH
/etc/init.d/ssh restart

chercher un package :


aptitude search <nom de mon package>
ou apt-cache search <nomdemonPackage>


Installation de Webmin


vi /etc/apt/sources.list
deb http://download.webmin.com/download/repository sarge contrib
apt-get update
apt-get install webmin


Verifier installtion webmin https://nomserveur:10000

(securisation SSL)

Installation apache 2 (Version Prefork)


apt-get install apache2-mpm-prefork


Installation PHP5

vim /etc/apt/sources.list

=> rajouter

deb http://dotdeb.thefox.com.fr stable all deb-src http://dotdeb.thefox.com.fr stable all

=> Rafraichir vos packets disponibles

apt-get update

apt-get install php5 php5-cli php-pear php5-gd php5-mysql libapache2-mod-php5

(toujours autoriser)

=>verification de installation


cd /var/www/apache2-default/
 vi phpinfo.php

 <?php phpinfo(); ?>


=>tester le fonctionnement de PHP5

http://ipserveur/apache2-default/phpinfo.php

http://DNS Serveur/apache2-default/phpinfo.php


Installation de la base de donnée

apt-get install mysql-server-5.0

sécurisation de MySQL

mysql_install_db

ou

 mysqladmin -u root password « monPassword»


mysql_secure_installation


Installation Phpmyadmin


apt-get install phpmyadmin


Installation de Bind = Serveur DNS

apt-get install bind9


Preparer son site :


cd /var/www/
 mkdir monSite


créer un user FTP :( via Webmin)


Installer un serveur FTP(Proftpd)

apt-get install proftpd

(option : independamment)


Configuration de Proftpd


vi /etc/proftpd/proftpd.conf

ServerName                      "Debian"
ServerType                      standalone
ShowSymlinks                    on
MultilineRFC2228                on
DefaultServer                   on
ShowSymlinks                    on
MaxInstances                    30
Port                            21
UseReverseDNS off
IdentLookups off
LogFormat                       traff "%b %u"
DefaultRoot                     ~
DenyFilter                      (\*.*/)|%
<Global>
DeferWelcome                    off
TimeoutNoTransfer               600
TimeoutStalled                  600
TimeoutIdle                     1200
PassivePorts                    50000 60000
User                            nobody
Group                           nogroup
Umask                           022
AllowStoreRestart on
AllowRetrieveRestart on
AllowOverwrite on
</global>
<VirtualHost 10.18.140.71>
ServerName "ksXXX.kimsufi.com "
ServerAdmin votre.adresse@emaill.com
Port 21
MaxLoginAttempts 2
RequireValidShell no
ListOptions -A
MaxClients 20
DefaultRoot ~
AllowOverwrite yes
<Limit LOGIN>
Order Allow,Deny
AllowUser votreuser
Deny from all
</Limit>
<Directory ~>
<Limit ALL>
AllowAll
</Limit>
</Directory>
</VirtualHost>


aller editer :

/etc/hosts
 ::1 ip6-localhost ip6-loopback ksXXX.kimsufi.com


Restart proFtpd

/etc/init.d/proftpd restart


Connection au FTP (créer un utilisateur via Webmin avant)

hote : ksXXX.kimsufi.com

utilisateur : titi

pwd : toto


Modifier les droits des repertoires : (pour resoudre les pbs de droits)

chown -R 1000:33 *


Restart apache Server (pour prendre en compte les changments)


a2ensite monSite.com.conf
 /etc/init.d/apache2 restart
 vi monSite.com.conf

oct

24

Posted by : admin | On : 24 octobre 2011

  1. Dans cette section nous allons nous attacher  d’installer la JDK et la JRE sur une environnement Linux (testé sur ubuntu)
  2. Dans la section suivante j’explique comment installer Maven 2 et son plugin sur Eclipse
  3. Enfin j’expose dans la dernière section le couplage de Maven 2 et de Ant . Nous pouvons imaginer par exemple que nous souhaitons « builder » notre projet et les déployer automatiquement sur la plateforme distante avec le moins d’effort possible . Nous allons donc voir dans cette section comment le couplage de ces deux technologies concorde dans la réponse à ce besoin .


Install JDK /JRE


  • Download JRE 6 :

http://java.com/fr/download/manual.jsp

mv jre-6u18* jre-6u18-linux-i586.bin
sudo mv ./jre-6u18-linux-i586.bin /opt/
cd /opt/
chmod +x jre-6u18-linux-i586.bin
sudo ./jre-6u18-linux-i586.bin</pre>
ln -sf /opt/java/jdkX.X.X_u/ /opt/java/jdk
ln -sf /opt/java/jreX.X.X_u/ /opt/java/jre
ln -sf /opt/java/jdkX.X.X_u/ /opt/java/default
echo "" >> /etc/profile
echo "#JAVA" >> /etc/profile
echo "JRE_HOME=/opt/java/jre" >> /etc/profile
echo "JDK_HOME=/opt/java/jdk" >> /etc/profile
echo "JAVA_HOME=/opt/java/default" >> /etc/profile
echo "export JRE_HOME JDK_HOME JAVA_HOME" >> /etc/profile
  1. Reconfigurer le java de votre machine si nécessaire:
sudo update-alternatives --config java
cd ~
ls -al

editer le bashrc

export JAVA_HOME=/usr/lib/jvm/java-1.5.0-sun-1.5.0.06 export PATH=$PATH:$JAVA_HOME/bin

# set PATH so it includes user's private bin if it exists

if [ -d ~/bin ] ; then

PATH=~/bin:"${PATH}"

fi

export JAVA_HOME=”/usr/lib/jvm/java-6-openjdk/″

export JDK_HOME=”${JAVA_HOME}”

export PATH=”${JAVA_HOME}/bin:${PATH}”

fi
export M2_HOME=/usr/local/apache-maven/apache-maven-2.2.1

export M2=$M2_HOME/bin

export MAVEN_OPTS="-Xms512m -Xmx1024m"

export PATH=$M2:$PATH

Install Maven2

  • lancer le script suivant
#!/bin/sh

mavenVersion="apache-maven-2.2.1"
wget http://apache.cict.fr/maven/binaries/apache-maven-2.2.1-bin.tar.gz

echo "== Telechargement de Apache Maven2 == "

tar -xvf apache-maven-2.2.*.tar.gz

if [ -d "/usr/local/apache-maven" ]
then
 echo "le repertoire /apache-maven existe deja"
 cp -r $mavenVersion /usr/local/apache-maven
 echo "== Copie du repertoire effectue == "
 rm -rf ./$mavenVersion
else
 cd /usr/local/
 mkdir apache-maven
 cd -
 cp -r $mavenVersion /usr/local/
 rm -rf ./$mavenVersion
fi

export M2_HOME=/usr/local/apache-maven/apache-maven-2.2.1
export M2=$M2_HOME/bin
export MAVEN_OPTS="-Xms512m -Xmx1024m"
export PATH=$M2:$PATH

echo "==== MAVEN  ==="
mvn --version

Install Maven2 plugin Eclipse

  • Download Maven 2 Plugin for Eclipse Help=> Software Update => Click Add enter the following adress. Accept the conditions and restart your Eclipse.


Spring Tool suite and Maven 2

Nb :  Commonly  STS Tool suite is being used as far as it come with Spring IDE integrate plus some other spring visualization such as spring batch and spring integration , namespace support …

  • Since version 2.8 there is some notable changes that must be taken in consideration (eg: Maven connector ) , I invite you guys to have a look at
  • I had encounter some difficulties a straightforward migration from version 2.7 to 2.8 so be diligent during the manipulation. check out the procedure in the link bellow

Procedure

http://blog.springsource.com/2011/10/18/upgrading-maven-integration-for-springsource-tool-suite-2-8-0/

Forum and FAQ

http://forum.springsource.org/showthread.php?116189-STS-2.8.0-and-m2e-FAQ


Ant et Maven

Dans cette section nous allons ajouter le plugin antrun plugin nous permettant d’utiliser les fonctionnalités de Ant via Maven 2

Pour cela il suffit d’inclure dans le fichier Pom.xml  le code ci dessous. Il ne reste plus qu’à ajouter vos appel de target ant relatif que vous souhaitez exécuter à chacune des phases du cycle de vie Maven à savoir :


  • validate: validate the project is correct and all necessary information is available
  • compile: compile the source code of the project
  • test: test the compiled source code using a suitable unit testing framework. These tests should not require the code be packaged or deployed
  • package: take the compiled code and package it in its distributable format, such as a JAR.
  • integration-test: process and deploy the package if necessary into an environment where integration tests can be run
  • verify: run any checks to verify the package is valid and meets quality criteria
  • install: install the package into the local repository, for use as a dependency in other projects locally
  • deploy: done in an integration or release environment, copies the final package to the remote repository for sharing with other developers and projects.


à la racine du projet nous allons donc créer un fichier build.xml (ant)  où nous allons répertorier les différentes taches Ant que notre projet va utiliser .


  • pom.xml
<build>
 <!-- Tips : To define the plugin version in your parent POM -->
 <pluginManagement>
 <plugins>
 <plugin>
 <groupId>org.apache.maven.plugins</groupId>
 <artifactId>maven-antrun-plugin</artifactId>
 <version>1.3</version>
 </plugin>
 </plugins>
 </pluginManagement>
 <!-- Tips: To use the plugin goals in your POM or parent POM -->
 <plugins>
 <plugin>
 <groupId>org.apache.maven.plugins</groupId>
 <artifactId>maven-antrun-plugin</artifactId>
 <version>1.6</version>
 <executions>
 <execution>
 <id>Information</id>
 <phase>compile</phase>
 <goals>
 <goal>run</goal>
 </goals>
 <configuration>
 <tasks>
 <ant antfile="${basedir}/build.xml" inheritAll="true"
 inheritRefs="true">
<!--Pass the required properties to ant File-->
 <property name="version" value="${version}" />
 <property name="artifactId" value="${artifactId}" />
 <!--Call ant Target here -->
 <target name="deploymentInformation" />
 </ant>
 </tasks>
 </configuration>
 </execution>
 <execution>
 <id>Deploiement</id>
 <phase>install</phase>
 <goals>
 <goal>run</goal>
 </goals>
 <configuration>
 <tasks>
 <ant antfile="${basedir}/build.xml" inheritAll="true"
 inheritRefs="true">
<!--Pass the required properties to Ant file -->
 <property name="version" value="${version}" />
 <property name="artifactId" value="${artifactId}" />

<!--Call the ant target you want to execute here ... -->
 <target name="XXXX" />

 </ant>
 </tasks>
 </configuration>
 </execution>
 </executions>

 <dependencies>
 <dependency>
 <groupId>ant</groupId>
 <artifactId>ant-jsch</artifactId>
 <version>1.6.5</version>
 </dependency>
 <dependency>
 <groupId>com.jcraft</groupId>
 <artifactId>jsch</artifactId>
 <version>0.1.44-1</version>
 </dependency>
 </dependencies>
 </plugin>
 </plugins>
 </build>
  • build.xml
 

<project name="MyProjectNAME" basedir=".">

 <description>FICHIER ANT DE RUN </description>

 <target name="deploymentInformation">
 <echo message=" Ant File : ${ant.file}"/>
 <echo message ="Ant version  :  ${ant.version}" />
 <echo message="Version :    ${version}" />
 <echo message="ArtifactId :    ${artifactId}" />

 </target>
  • Le transfert SCP
 <target name="copyArchive">
 <scp
 todir=${usr}:${password}@${hostduserveur}:${DestinationFolder}/${artifactId}"
 port="22" trust="true" verbose="true" failonerror="true"
 file="${basedir}/target/${artifactId}-${project.version}-.tar.gz">
 </scp>
 </target>
  • Le remote Sheel via SSH(port 22 par défault )


<target name="deploymentCreate">
<sshexec host="${host}" username="${user}" keyfile="${privateRSAKEY}" trust="yes"  command="${NameScript} ${ARG1/2/3...}" verbose="true" >
</sshexec>
</target>
  • A noter que j’ai rencontré des problèmes lors de multiples invocations de remote shell le programme Maven2 /ant s’arrête apparaement il s’agirait d’un bug répertorié sur bugzilla qui serait en cours de correction .


Ressources et références

http://www.avajava.com/tutorials/lessons/what-are-the-phases-of-the-maven-default-lifecycle.html

http://www.developpez.net/forums/d700132/java/edi-outils-java/build/maven/maven-ant-acces-aux-properties-maven-fichier-build-xml-dant/

http://maven.apache.org/plugins/maven-antrun-plugin/usage.html

http://ant.apache.org/manual/Tasks/scp.html

http://ant.apache.org/manual/Tasks/sshexec.html

  • maven helper :
http://stackoverflow.com/questions/2244344/deploying-assembly-package-with-maven-release-plugin